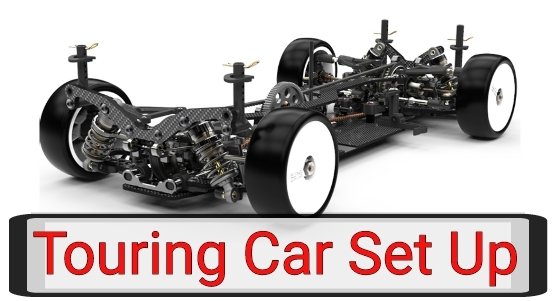
Touring Car Set Up Help
Camber
What is Camber?
Camber is the angle of the tops of the wheels from straight up and down. Leaning in is Negative Camber, leaning out is Positive Camber. As a car turns, the chassis rolls. As the car rolls, this causes the tires to lean over towards the turn, causing less tire to come in contact with the ground (at 0deg Camber). So to compensate, we add a few degrees of negative Camber. When the same car rolls, it rolls up on to the negative Cambered tire, now setting the tire at 0deg, or the largest possible contact patch the tire can have. As we all know, the larger the contact patch, the more the tire is in contact with the ground, and the most possible traction you can have.

Camber is usually adjusted by turnbuckles that pivot the wheel from the lower outer hinge pin. Some cars use what’s called a Pivot Ball Suspension…the steering block is attached to the A-Arm by a Pivot Ball. Screwing the upper Pivot Ball in will add Negative Camber, while unscrewing the same Pivot Ball will remove Camber, setting it closer to 0deg.Giving one end of the car less Camber gives that end less traction. For instance, if your car is loose (oversteer), you could either add a degree of rear Camber (recommended) or take out a degree of front Camber. Oddly enough, Camber works a little differently on either end of a touring car. On the front, you should use roughy around -1 to -2deg of Camber. It is rare that you will use more than that. There is a point where you can add to much front Camber. If so, steering will decrease as the tires will roll over the perfect contact patch area.On the rear, Camber affects two things. In a straight line, maximum acceleration is achieved with 0 degrees of Camber. Adding Camber reduces forward traction slightly, but you will gain cornering grip. So, there is a fine line on rear Camber. Starting at about -1deg is your best bet, and work from there. -2deg to -3deg of negative Camber is the norm for most vehicles. We never use positive camber on Touring Cars.

Ride Hight
What is Ride Height?
Ride Height is the distance measured from the bottom of the chassis to the ground. This adjustment should always be made with the car in race ready condition, meaning all electronics installed, including the motor and battery. Basically, Ride Height changes the speed of how the car reacts while changing directions. It will be really noticeable in chicanes, or S-turns, where changing directions is crucial.Ride Height is easily changed on all cars. Some cars have ‘pre-load clips’ on the shocks, others threaded shocks. To change the Ride Height, first place the vehicle on a flat surface (this is crucial!!!). Make sure you have some sort of gauge to keep accurate measurements (simply making the shock collars or pre-load clips even on each side of the car will not work). Your best off getting a Ride Height gauge which is well worth the investment and can be invaluable in this situation.

Slide the gauge under the car until one of the steps comes in contact with the bottom of the chassis. This is the Ride Height of this part of the car. Add/remove pre-load clips, or adjust the shock collars, until the desired Ride Height is achieved. Now repeat for the other side of the car, making sure you take the measurement from the exact place you took it from on the other side of the car.For high bite tracks, use a lower Ride Height. For low traction surfaces, raise the car up slightly. Raising the Ride Height will cause the car to roll more, allowing for more traction. Raising the car up will also help in bumpy situations.
Droop
What is Droop?
Droop is the amount of down travel a suspension arm has. Droop can be set independently from front to back, but should be the same (normally) from side to side.You can limit Droop in Touring Cars with the Droop screws located in the suspension arms. By screwing these in or out, you adjust how much Droop that corner of the car has.

Typically, less Droop reduces body roll. Less in the rear will free up the rear a bit, giving more steering. More Droop in the front is good for better on-power steering. It should always be necessary to increase Droop for bumpy tracks, and decrease Droop for high-traction tracks, such as carpet.
Toe In - Toe Out
What is Toe In / Toe Out?
Toe In / Toe Out describes the angle of the front (or rear) tires when viewed from above. If the front of the tires angles in (or towards the chassis), that is Toe In. If the front of the tires angles out (or away from the chassis), that is Toe Out.Toe In / Toe Out can be adjusted to increase or decrease steering and steering response. You adjust Toe In / Toe Out by turning the turnbuckles attached to the steering knuckles or hub carriers.

Front:
Adding Toe In will decrease steering into a corner, but add steering out of a corner during acceleration. Toe In will also stabilize the car under acceleration. Toe Out will increase steering into a corner, but cause the car to wander a little on the straights and in bumpy sections. It is not normally suggested that you use more than 1deg of Toe In or Toe Out
Rear:
More Toe In results in less on-power steering and slightly more entering a corner. Less Toe In results in more on-power steering and slightly less entering a corner. Less Toe In will also increase staightaway speed, as the rear tires will scrub less.On the rear, there will always be Toe In or 0deg of Toe. You will never use Toe Out in the rear. On most cars, a Toe Block designates the degree of Toe, while others have turnbuckles to adjust (similar to the front). To change rear Toe, either adjust the turnbuckles or remove the Toe block and replace with another block.